Building an Arc Reactor: Part I: Failure!
Failure is actually an overstatement. But it's clear that the current approach won't meet my expectations, so I'm going to call it a failure and strive to do better.
I've been designing an arc reactor that Julie can wear for cosplay or just when she wants to feel like a bad-ass.
The initial design was based on a prop she ordered. It was just LEDs and a battery holder. I figured I could do the same thing, but miniaturize it and improve the construction.
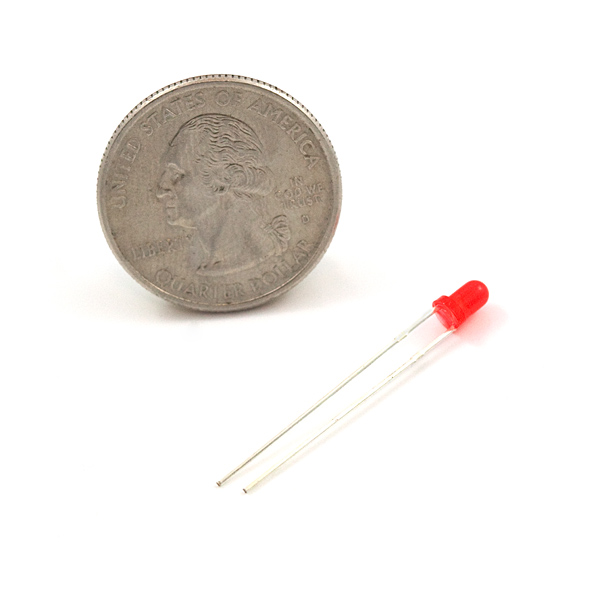
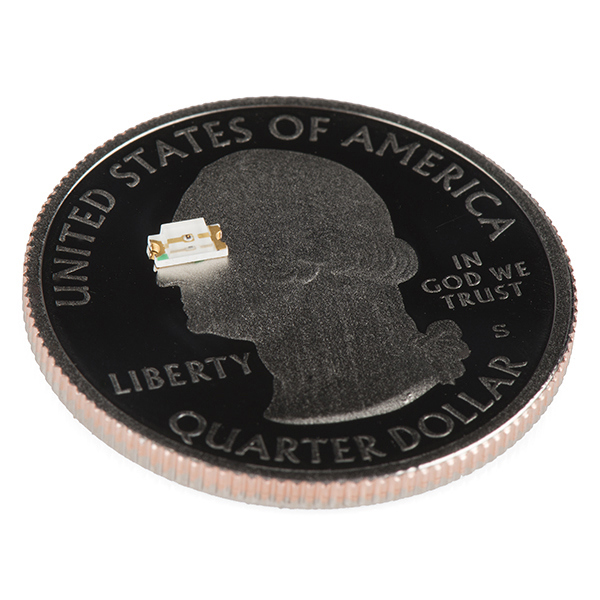
The main improvement was to replace the big chunky LEDs with Surface Mount Device (SMD) LEDs. See, LEDs are actually very, very, very small by nature. When you see the kind that most hobbyists use, most of their bulk is actually to make them easier to hold and solder. Miniaturizing them isn't really an issue. You just manufacture them normally and then leave out the bulk. The result is a little tiny light that is bright as hell. The only tricky part is soldering them.
My plan was to use Wire Glue. You can see the approach below.


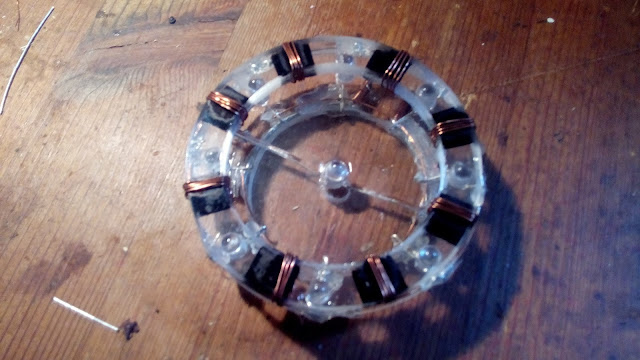
It started out great. Jack laser cut the components at work for me. I then glued the SMD LEDs in place, as well as the wires. Then I globbed on some conductive wire glue and added a battery compartment.

Annnnd it was a failure. It turns out that wire glue is garbage. It's not conductive enough. The little lights blink and flicker, but they won't illuminate with anything close to their full power. When you stick a battery to a regular copper wire, electricity just flows unimpeded. But with the wire glue, it flows like black strap molassas through a coffee stirrer. The glue is conductive technically, but if you were trying to wire a computer it would never turn on. If you tried to use it to repair an electric chair, you'd be a champion to the ACLU because that electric chair would be thoroughly ruined. Which makes wire glue good for one thing, I guess.
So I slept on it and concluded that the answer is clear. There is a right way to do this, and that's with solder. The reason I didn't use solder originally is because I thought that I'd need to manually solder each connection, which is almost invisible to the naked eye. Also I, I was trying to replicate the original design, so I'd started with a piece of acrylic, which won't stand up to heat. After some consideration and research I found the answer. I'll print a circuit board, attach the connections with solder paste, then melt and cure the solder paste in a process called "reflowing". This is actually how the cheap, tiny, circuit boards inside computers and cell phones are made, except that industrial robots and Chinese factory workers are used to mass produce them. If you're working at a small scale, you can do this at home using pretty simple components.
Then again, 'simple' is what I thought the wire glue would be like. Simple and straightforward. Anyway, I'm excited to see how the next attempt comes out. Below are some pictures of the current 'failure'.


I've been designing an arc reactor that Julie can wear for cosplay or just when she wants to feel like a bad-ass.
The initial design was based on a prop she ordered. It was just LEDs and a battery holder. I figured I could do the same thing, but miniaturize it and improve the construction.

This is the original that served as inspiration for my design. Notice the big bulky LEDs.
The main improvement was to replace the big chunky LEDs with Surface Mount Device (SMD) LEDs. See, LEDs are actually very, very, very small by nature. When you see the kind that most hobbyists use, most of their bulk is actually to make them easier to hold and solder. Miniaturizing them isn't really an issue. You just manufacture them normally and then leave out the bulk. The result is a little tiny light that is bright as hell. The only tricky part is soldering them.
On the left is a conventional LED. On the right is an SMD LED. The electronics are almost identical, the left one just has a ton of extra plastic and metal to make them easy to handle.
My plan was to use Wire Glue. You can see the approach below.

I glued the SMD LEDs on...

... then glued down wire and connected the wire to the LED terminals with the black wire glue.

Even with all this wire glue, the connections sucked.
So I slept on it and concluded that the answer is clear. There is a right way to do this, and that's with solder. The reason I didn't use solder originally is because I thought that I'd need to manually solder each connection, which is almost invisible to the naked eye. Also I, I was trying to replicate the original design, so I'd started with a piece of acrylic, which won't stand up to heat. After some consideration and research I found the answer. I'll print a circuit board, attach the connections with solder paste, then melt and cure the solder paste in a process called "reflowing". This is actually how the cheap, tiny, circuit boards inside computers and cell phones are made, except that industrial robots and Chinese factory workers are used to mass produce them. If you're working at a small scale, you can do this at home using pretty simple components.
Then again, 'simple' is what I thought the wire glue would be like. Simple and straightforward. Anyway, I'm excited to see how the next attempt comes out. Below are some pictures of the current 'failure'.

This picture gives a grossly misleading impression. The camera is adjusting and making the lights far brighter than they are in real life.

This picture is a little better. Each of those little LEDs should outshine the big ones on the left. The camera is still compensating too much.

I'll quit complaining, because I'm still proud of this as a first attempt.

The final version will have a lot of aesthetic components not yet added.

These are the other pieces, before painting. Once finished it should look pretty sweet.
pretty awesome. soldering is hard, i don't blame you for trying other methods first.
ReplyDeletepretty awesome. soldering is hard, i don't blame you for trying other methods first.
ReplyDeleteAwesome project. I wonder what you might do with some thick fiber-optic cable. You could hide the point-light LEDs and have the cable glow?
ReplyDeletehttp://www.fiberopticproducts.com/Sgs10sz.jpg
I have some extra lying around somewhere, I believe, if you want to play with it.